A few months ago, LeadPages launched their drag & drop builder.
It's a fine tool, granted they should have had a page builder eons ago instead of forcing people to cram their marketing messages into pre-built templates … but, that's a moot point.
They have a page builder now and it lacks one core feature – the ability to conduct split tests.
This post will show you how to split test the pages you build using the LeadPages' page builder.
Related article: How to build your own landing page platform
Step #1: Build Your Pages
You need at least 3 pages in order to properly conduct a split/multivariate test:
- Version A (Original)
- Version B (Variation 1)
- Thank You Page
Both, versions need to “land” on the same Thank You Page upon successful opt-in.
If you don't have these pages built already, build them now.
Step #2: Add Google Analytics To Pages
If you don't have a Google Analytics account already – go get one.
Now, snag your Google Analytics tracking code. You can find it under “Property”, “Tracking Info”, and “Tracking Code”.
It looks like this:
![]()
Head over to LeadPages and open one of your three pages in the editor.
On the left hand side, click the option for “SEO & Analytics”, then select the “Analytics” tab.
In the “Head Section Tracking Code” text box, paste in your Google Analytics tracking code:
![]()
Don't forget to save your changes and click “Update”!
Add the Google Analytics code to the rest of your pages.
Step #3: Create A Goal In Google Analytics
In order for Google Analytics to keep track of your split test, you need to tell it what your goal is.
In the case of squeeze pages, the goal is usually the Thank You Page; the only way for someone to land on a Thank You Page is by opting in.
So, you need to tell Google Analytics that a goal is reached when someone lands on your Thank You Page.
In your Google Analytics account, navigate to your “View”, select “Goals”, and “New Goal”:

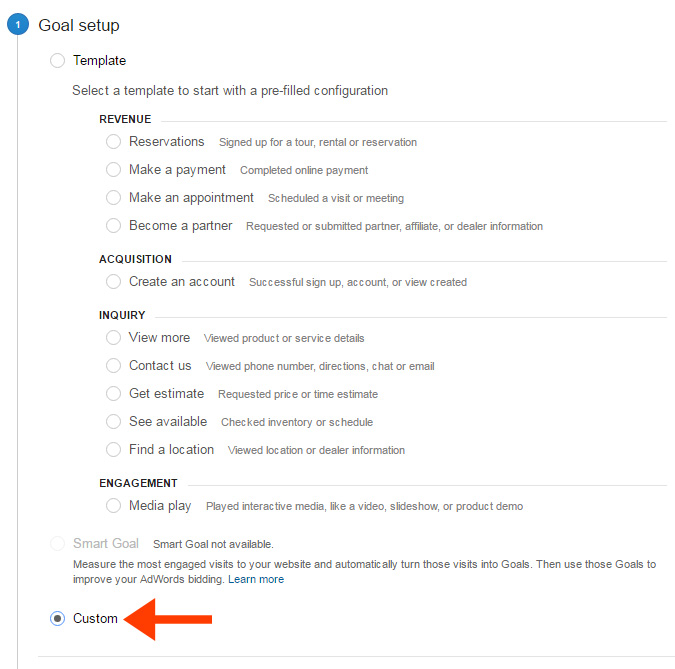
Under “Goal setup”, select “Custom”, then click “Continue”:
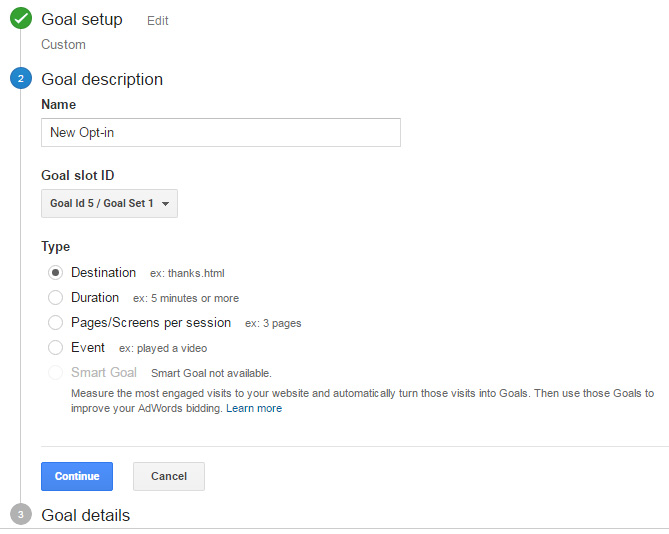
Name your goal, leave “Goal slot ID” alone, select “Destination” for Type, then click Continue:
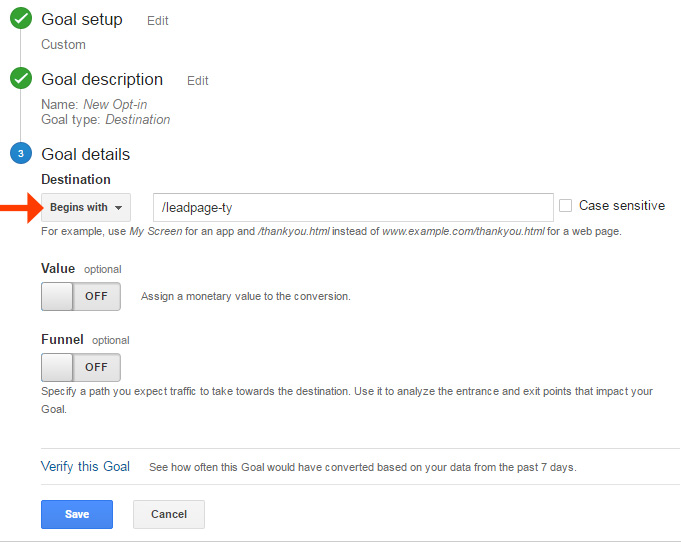
For “Destination” choose “Begins with” and enter the path to your Thank You Page. Leave “Value” and “Funnel” off and click “Save”:
Great! Your goal is setup.
Step #4: Start A Google Experiment
It's now time to setup an “Experiment” in Google Analytics to test which landing page results in the best conversion rate.
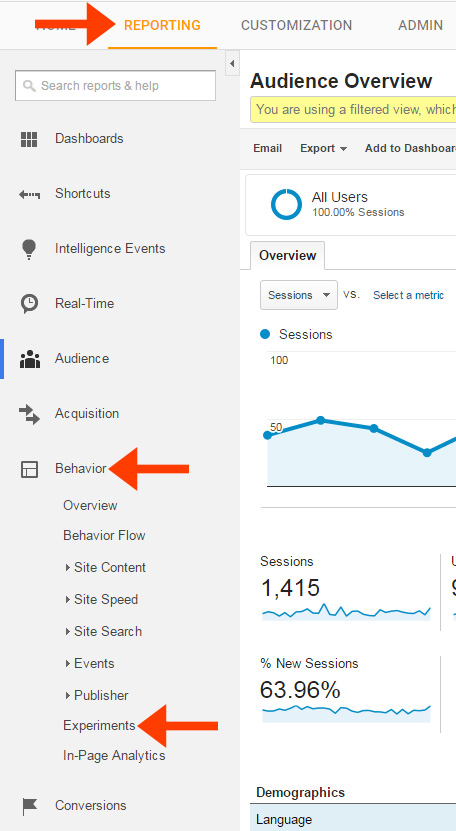
In Google Analytics, click the “Reporting” tab, then “Behavior”, and “Experiments”:
Click the “Create experiment” button.
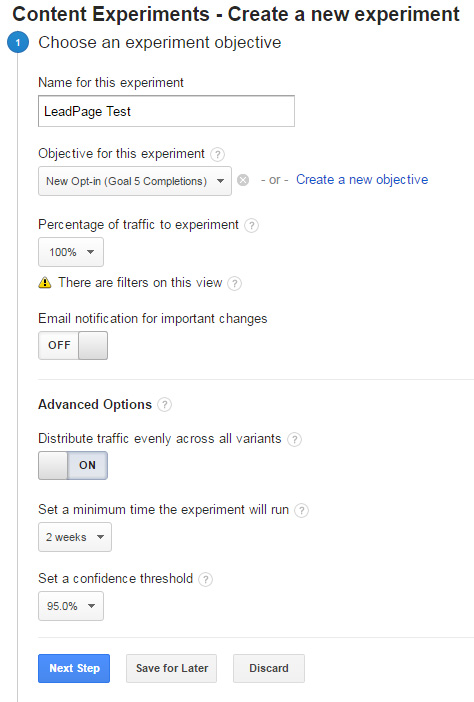
Name your experiment, select the goal you just created, and select 100% of traffic to experiment.
Open the “Advanced Options” area and turn on “Distribute traffic evenly”, minimum of 2 weeks, and 95% confidence threshold.
Note: You don't have to select the settings I mentioned above if you'd prefer others. There are reasons to have different settings; however, if you're unsure why you'd want different settings … just follow what I've laid out.
Click “Next Step”:
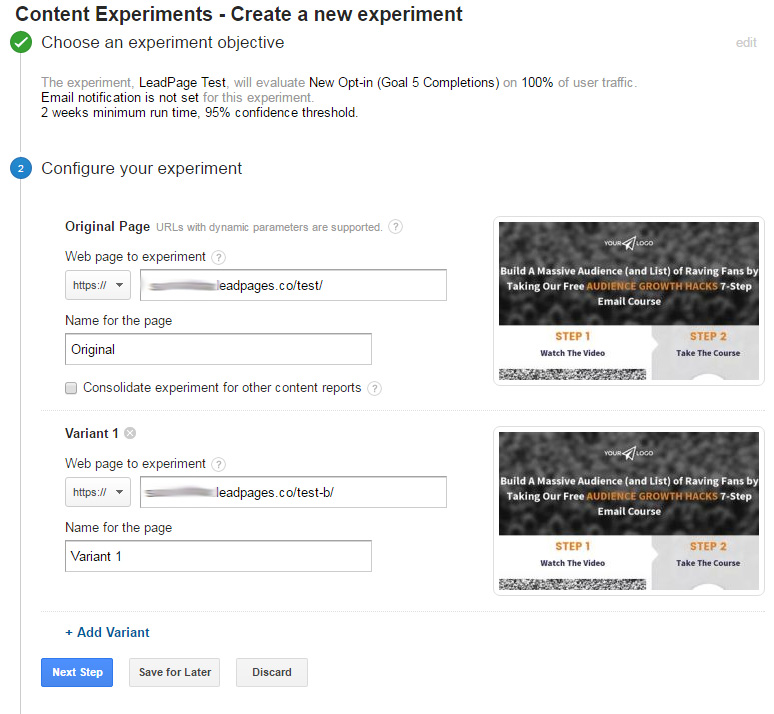
Insert the URLs to the Original and Variant(s).
At this point, it doesn't matter which page you want to consider the “Original” – you could even rename them to Versions A & B if you want. However, on the next step, you'll have to add some extra code to whichever page you considered the “Original” – so, keep track.
Google Analytics will also pull in screenshots of your landing pages to help you verify you have entered the correct URLs.
Click “Next Step”:
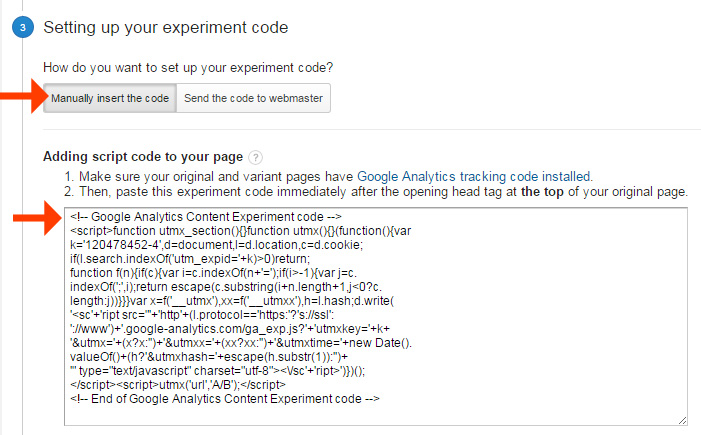
Select “Manually insert the code”, copy the code, and head back over to LeadPages to edit whichever page you told Google Experiments was the “Original”:
Navigate to where you pasted the Google Analytics code (On the left hand side, click the option for “SEO & Analytics”, then select the “Analytics” tab.)
Paste the Experiment code ABOVE the analytics code:
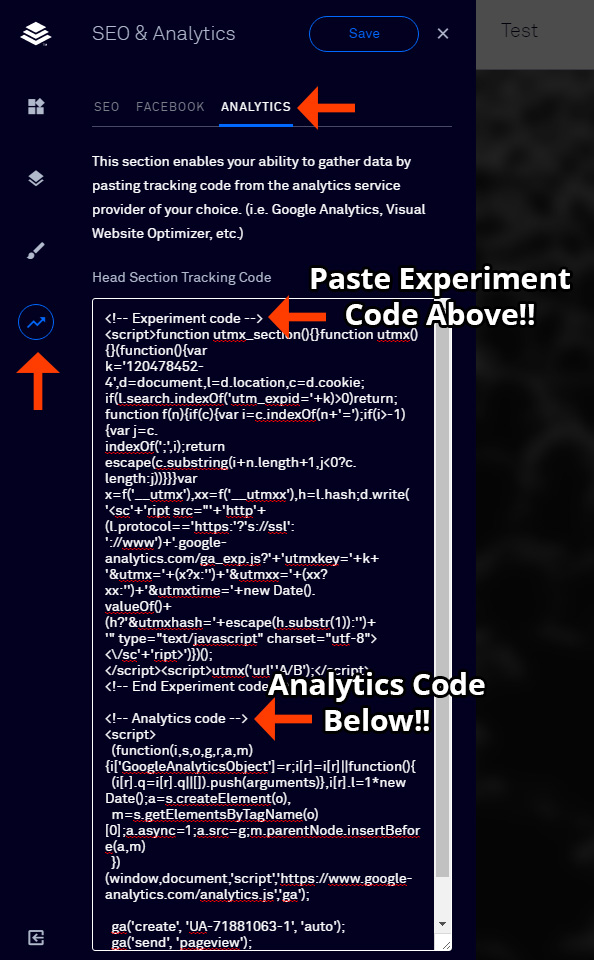
Don't forget to save and update!
Go back to Google Analytics and “Review and start”. You'll want to validate your experiment code and get 2 check marks:
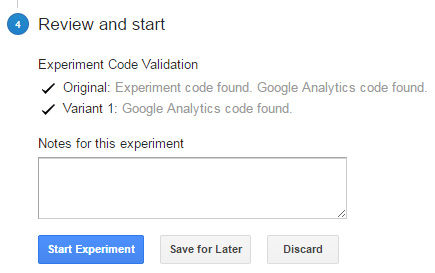
If you don't see 2 check marks, Google Analytics will tell you why there's an issue. For example, “Can't find Experiment code” – in which case, you need to make sure the code is on your “Original” page and that you've both saved and updated the page.
Once you have 2 check marks, click “Start Experiment”:
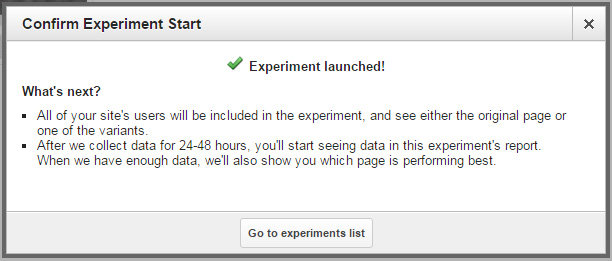
Step #5: Send Traffic!
Now that the experiment is setup, it's time to send tons of traffic to your “Original” landing page! (the one you told Google Experiments was your “Original” and the one you added the extra experiment code to.)
Google Analytics/Experiments will automatically send half your visitors to the “Original” page and half to the variation. (unless you selected different options during the setup, in which case, it'll spread traffic how you told it to)
Now sit back and collect data to see which one is the winner!
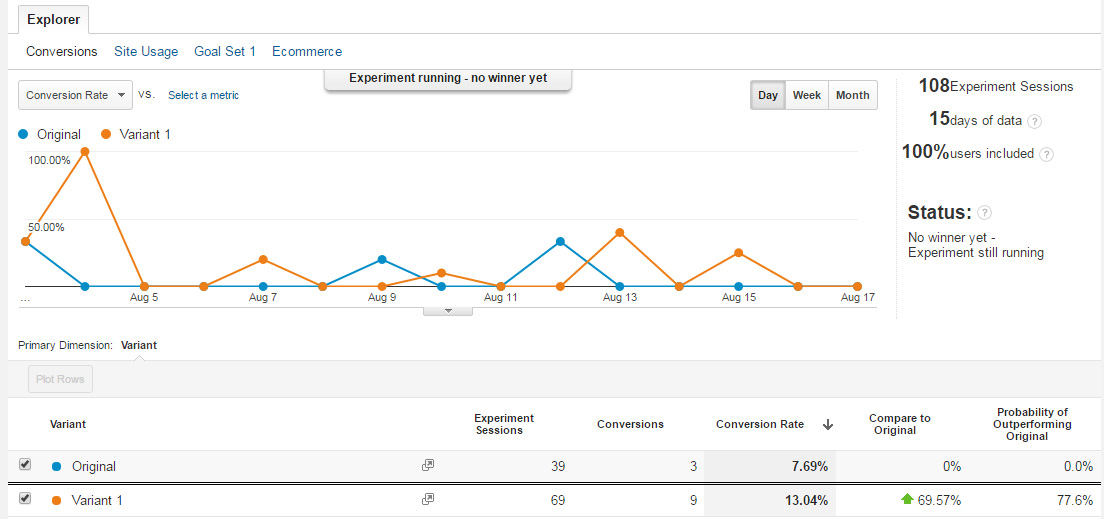
As you can see in the example above, Variant 1 is performing 69.57% better than the original, awesome! Of course, the experiment isn't over yet because the statistical significance (probability of outperforming original) hasn't been met yet … but, it appears the new version is performing well!
Conclusion
This same split testing concept can be applied to more pages and platforms than just LeadPages!
For example, here's a video of the same concept being applied to OptimizePress.
Click here to learn how to build your own landing page platform with OptimizePress!